Table of Contents
Creating, Editing, and Deleting an Assignment
Creating an assignment
To create a new assignment, click Create Assignment in the bottom right corner of your course’s Assignments page. The Create Assignment page and workflow appears where you can choose from a variety of assignment types.
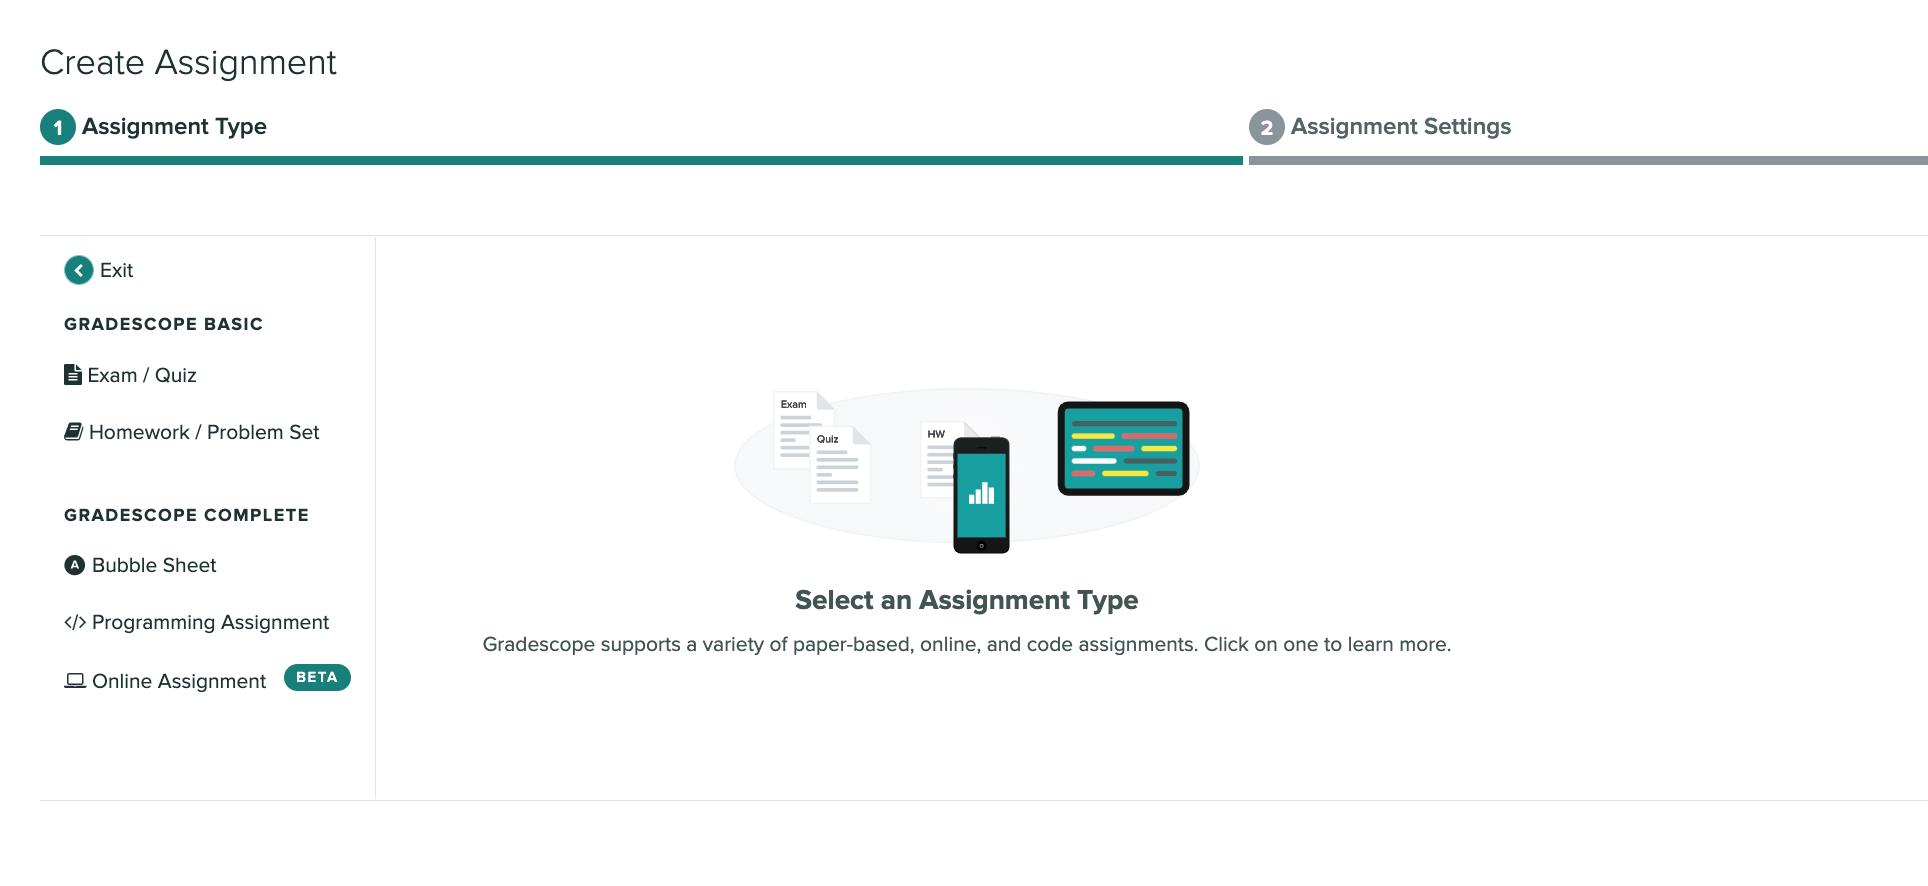
If you want more details about each type, check out the Assignment Types article. In general, here is a quick overview of each type:
- Exam / Quiz: An instructor-uploaded assignment where students answer in designated regions.
- Homework / Problem Set: Instructors specify a window of time that students can submit their work. Students upload their work via their phone or computer.
- Bubble Sheet: Using a Gradescope Bubble Sheet template instructors can mark correct answers and have submissions automatically graded.
- Programming Assignment: Instructors can grade student code with autograders or manually grade each submission.
- Online Assignment: Instructors create questions on Gradescope and students can submit responses online.
Many of these assignments share similar properties. Some of the commons ones are below. Specific details for each type can be found linked above.
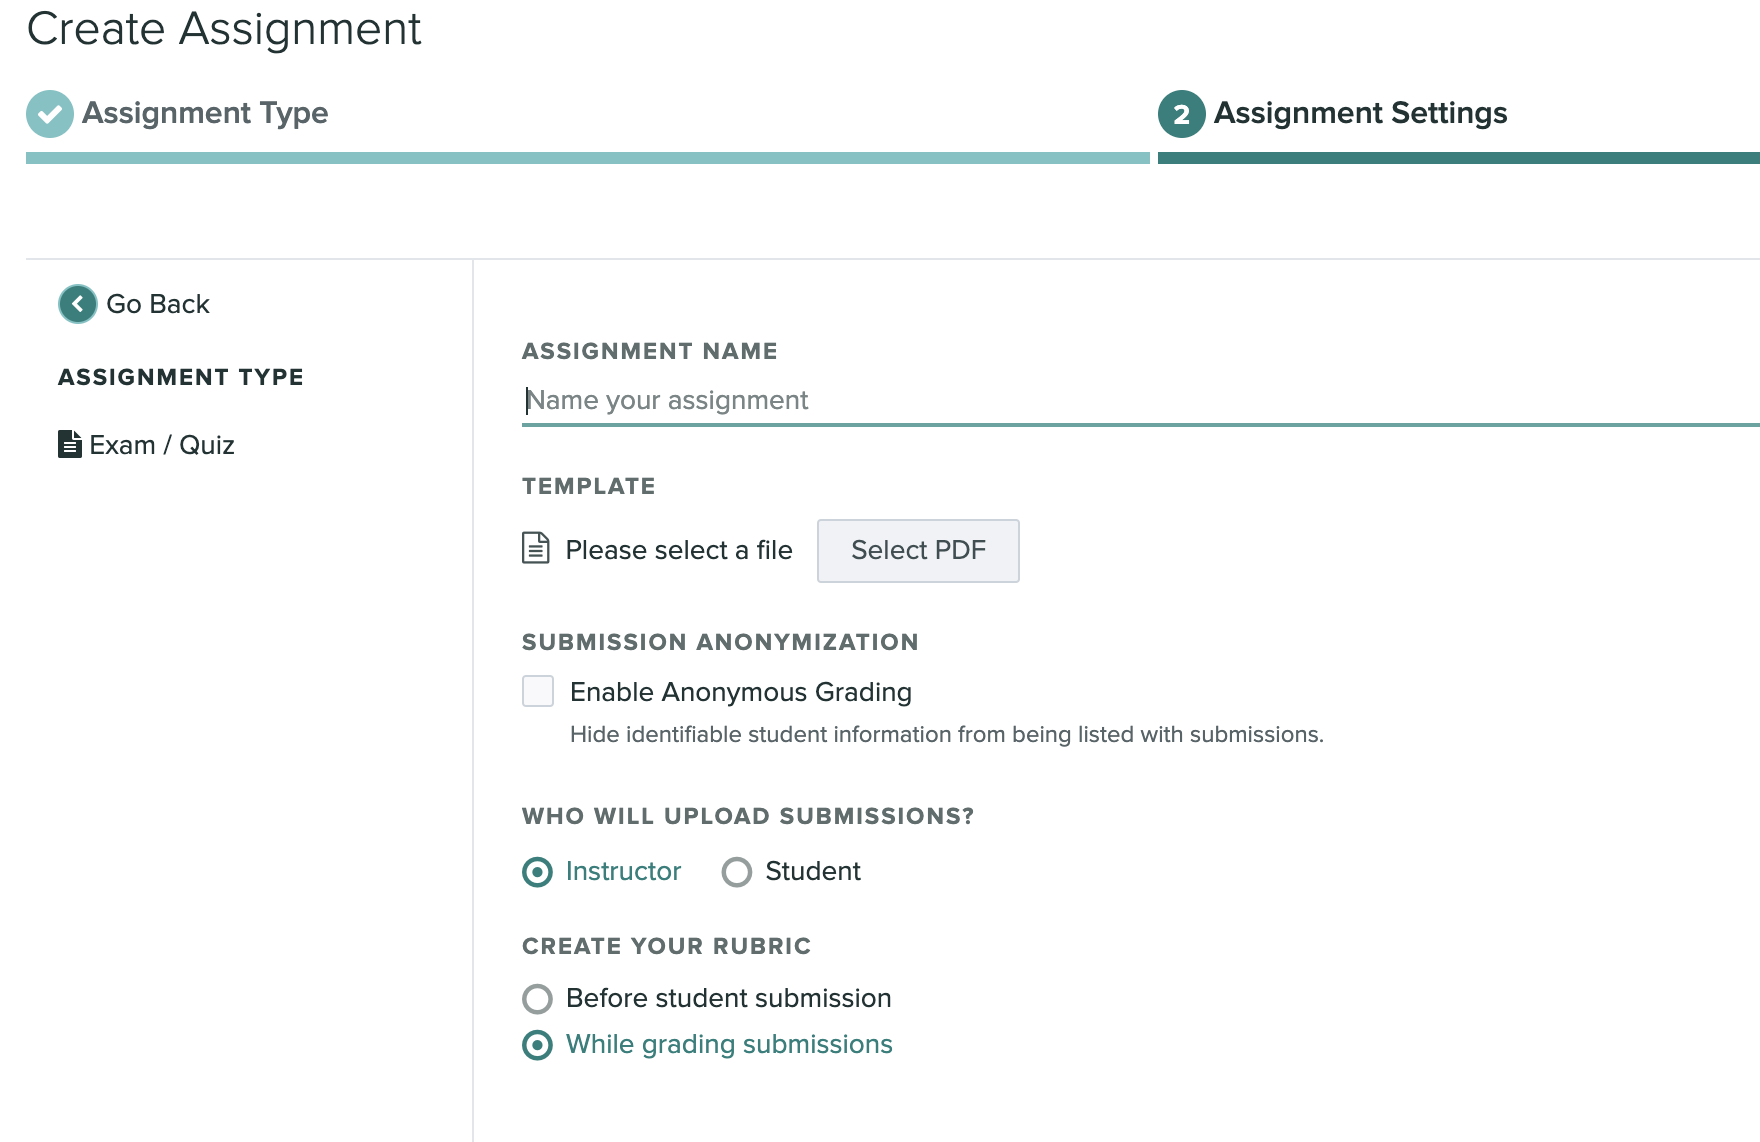
Choosing assignment settings
The template PDF
The template PDF should be a blank version of your test, or instructions such as a list of assigned homework problems. This PDF is used in further steps of Gradescope such as Creating an Outline.
Students will only be able to view and download this file if your assignment will be student-uploaded and you have enabled Template Visibility. See the Who will upload submissions? and Template Visibility sections on this page for more information.
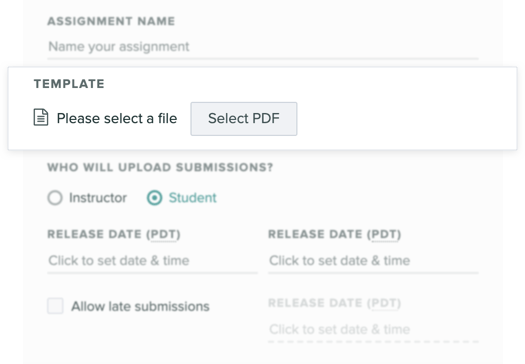
Who will upload submissions?
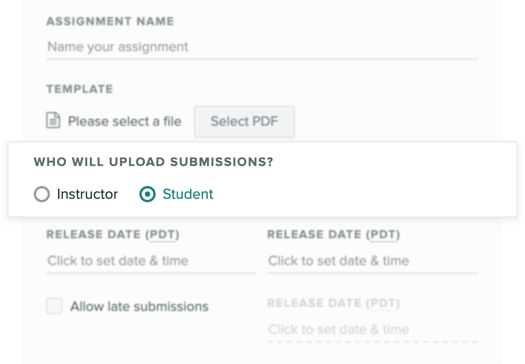
Many assignment types let you specify whether you want instructors or students to upload submissions.
- Select Instructor if you want course staff to collect, scan, and upload student work (e.g., a paper-based quiz).
- Select Student if you want students to upload their own work (e.g., a problem set, lab report, or programming assignment).
Students will not be able to see any part of an instructor-uploaded assignment until grades are published. With student-submitted assignments, students will be able to submit work between the Release Date and the Due Date (or Late Due Date if set). Students will then be able to see their graded work once the assignment is published. When students submit their work successfully to an assignment, they will receive an automated email from Gradescope that includes the day and time they submitted work, the assignment Due Date, the Late Due Date (if you set one), and a link to their submission. The email also reminds them that they can resubmit work as many times as they need to until the Due Date.
Release Date, Due Date, Late Due Date
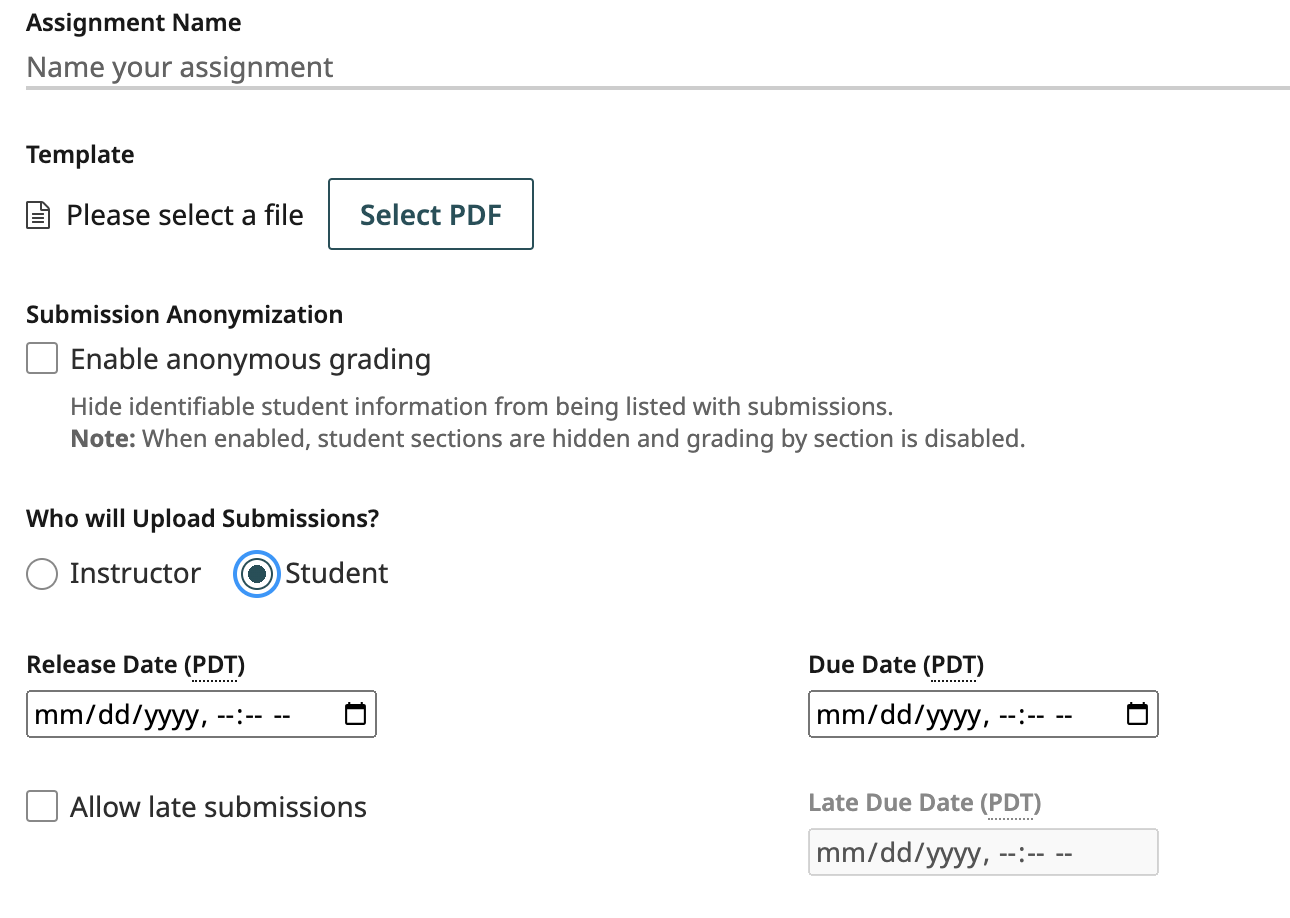
For student-uploaded work, there are a few extra options to set.
The Release Date specifies the date and time when students will become able to submit their work. The Due Date specifies when students will stop being able to submit their work without any late penalties. The Late Due Date specifies the last date when students will be able to submit their work on Gradescope.
Submissions uploaded between the due date and late due date will be marked ‘late’ on the Manage Submissions page, Review Grades page, and in the grading interface. You will be able to apply custom late penalties to late submissions during grading, via the submission-specific point adjustments field on the grading page, or by creating a Late Deductions question with its own rubric.
Timed assignments
For all student-uploaded assignments (except Programming Assignments), you will also have the option to enforce a time limit using the Maximum Time Permitted feature. This allows you to give students a set number of minutes to complete an assignment from the moment they open it and see the questions or the submission dialog box.
When students open an assignment with a time limit, they’re told how long they have to complete it and the latest date and time they can begin working to have the full time allowed before the due date and late due date (if you set one). Then to start the timer and see the assignment questions and/or submission dialog box, students must confirm that they’d like to begin. Students will also have a countdown timer on their screen as they complete the assignment. They can hide the timer if they don’t want to see it and reveal again if they change their mind.
Students can update their answers and resubmit files any number of times. The most recently submitted work at the end of the time limit will be saved for you to view and grade. Because students only have a finite amount of time to enter their answers and submit work, timed assignments reduce the risk of students cheating or working together to get the answers.
Extending dates and time limits
If you want to extend or modify when a specific student can start, work on, or submit an assignment, check out Extending assignment release dates, due dates, late due dates, and time limits.
To learn how to give a student more time on all timed assignments in a course, check out Extending time limits at the course level. Currently, at the course level, you can only give blanket time limit extensions. You cannot give a student an extension on all assignment release dates, due dates, or late due dates in a course at once. You would need to give the student those extensions on each assignment.
Submission Type
If students will be uploading their own work on an Exam/Quiz and Homework/Problem Set assignment, you can choose the way you'd like them to upload their work. This is called the submission type. Here are the types you can choose from:
- Variable Length
- Students can submit any number of pages and then indicate which pages correspond to which problem at upload time. This is commonly used for a list of textbook problems or lab reports. (We support PDF and Image uploads with this submission type)
- Templated (Fixed Length)
- Students are expected to write their responses in known regions. This works well for exams and worksheets. Because the location where students will mark their answers are fixed, AI-Assisted Grading is available with this submission type. (We only support PDF uploads with this submission type)
Group Submissions
If Group Submissions are enabled, students will be able to add group members to their submission. You can set a limit for the maximum number of students that can be in a group. Students can add or edit group members at any time (even after the deadline), but you will always be able to see everyone’s full submission history. You can also add or delete group members by clicking on the submission from the Manage Submissions page and clicking the Group Members button in the bottom action bar.
Please note that instructor-uploaded group assignments aren’t directly supported yet, but you can email help@gradescope.com to learn more about handling instructor-uploaded group assignments on Gradescope.
Template Visibility (Homework, Exams, and Bubble Sheets)
If you’ve configured your Homework, Exams, or Bubble Sheets so that students will be uploading their own work, you will see an option to change Template Visibility in your Assignment Settings. By selecting Allow students to view and download the template for Template Visibility, students will be able to view and download a blank copy of their assignment on Gradescope after the release date. On Homework / Problem Set and Exam / Quiz assignments, students will be downloading the blank template you uploaded to create your assignment outline. For Bubble Sheet assignments, students will be downloading Gradescope’s blank 200-question template that contains five answer bubbles per question, but no question content. You will still need to give students the questions for their multiple choice assignment outside of Gradescope.
Rubric Creation
When creating your assignment, you’ll be given the option to:
- Create your rubric before receiving student submissions (Institutional license feature), or
- Create your rubric while grading submissions
Creating a rubric before student submission - Once you have finished creating your Assignment Outline, you will be directed to the Create Rubric page. If any questions do not receive a rubric on this page, you can return to create one later or while grading.
Templated and Online assignments will display a preview of each question, while variable length and programming assignments will list each question.
Creating a rubric while grading - When you are ready to begin grading, access the Grade Submissions tab of the assignment and select a question. A blank rubric is displayed to the right of the submission.
Labeled Printouts (Beta)
Currently in beta for instructor-uploaded Homework/Problem Set and Exam/Quiz assignments, the Create Printouts button on the Manage Scans page allows you to generate a single PDF file containing labeled copies of your Template file. You can download and distribute the labeled printouts to give each student a copy of the assignment with a unique label on each page. Students will then complete their work on those labeled pages. When you scan in students’ submissions, Gradescope will use the labels to automatically group the pages of each student’s submission together, no matter the order they were scanned or uploaded in. For step-by-step instructions on this feature, see the Managing Scans help page. To have this feature added to your courses, please contact help@gradescope.com.
Viewing active assignments
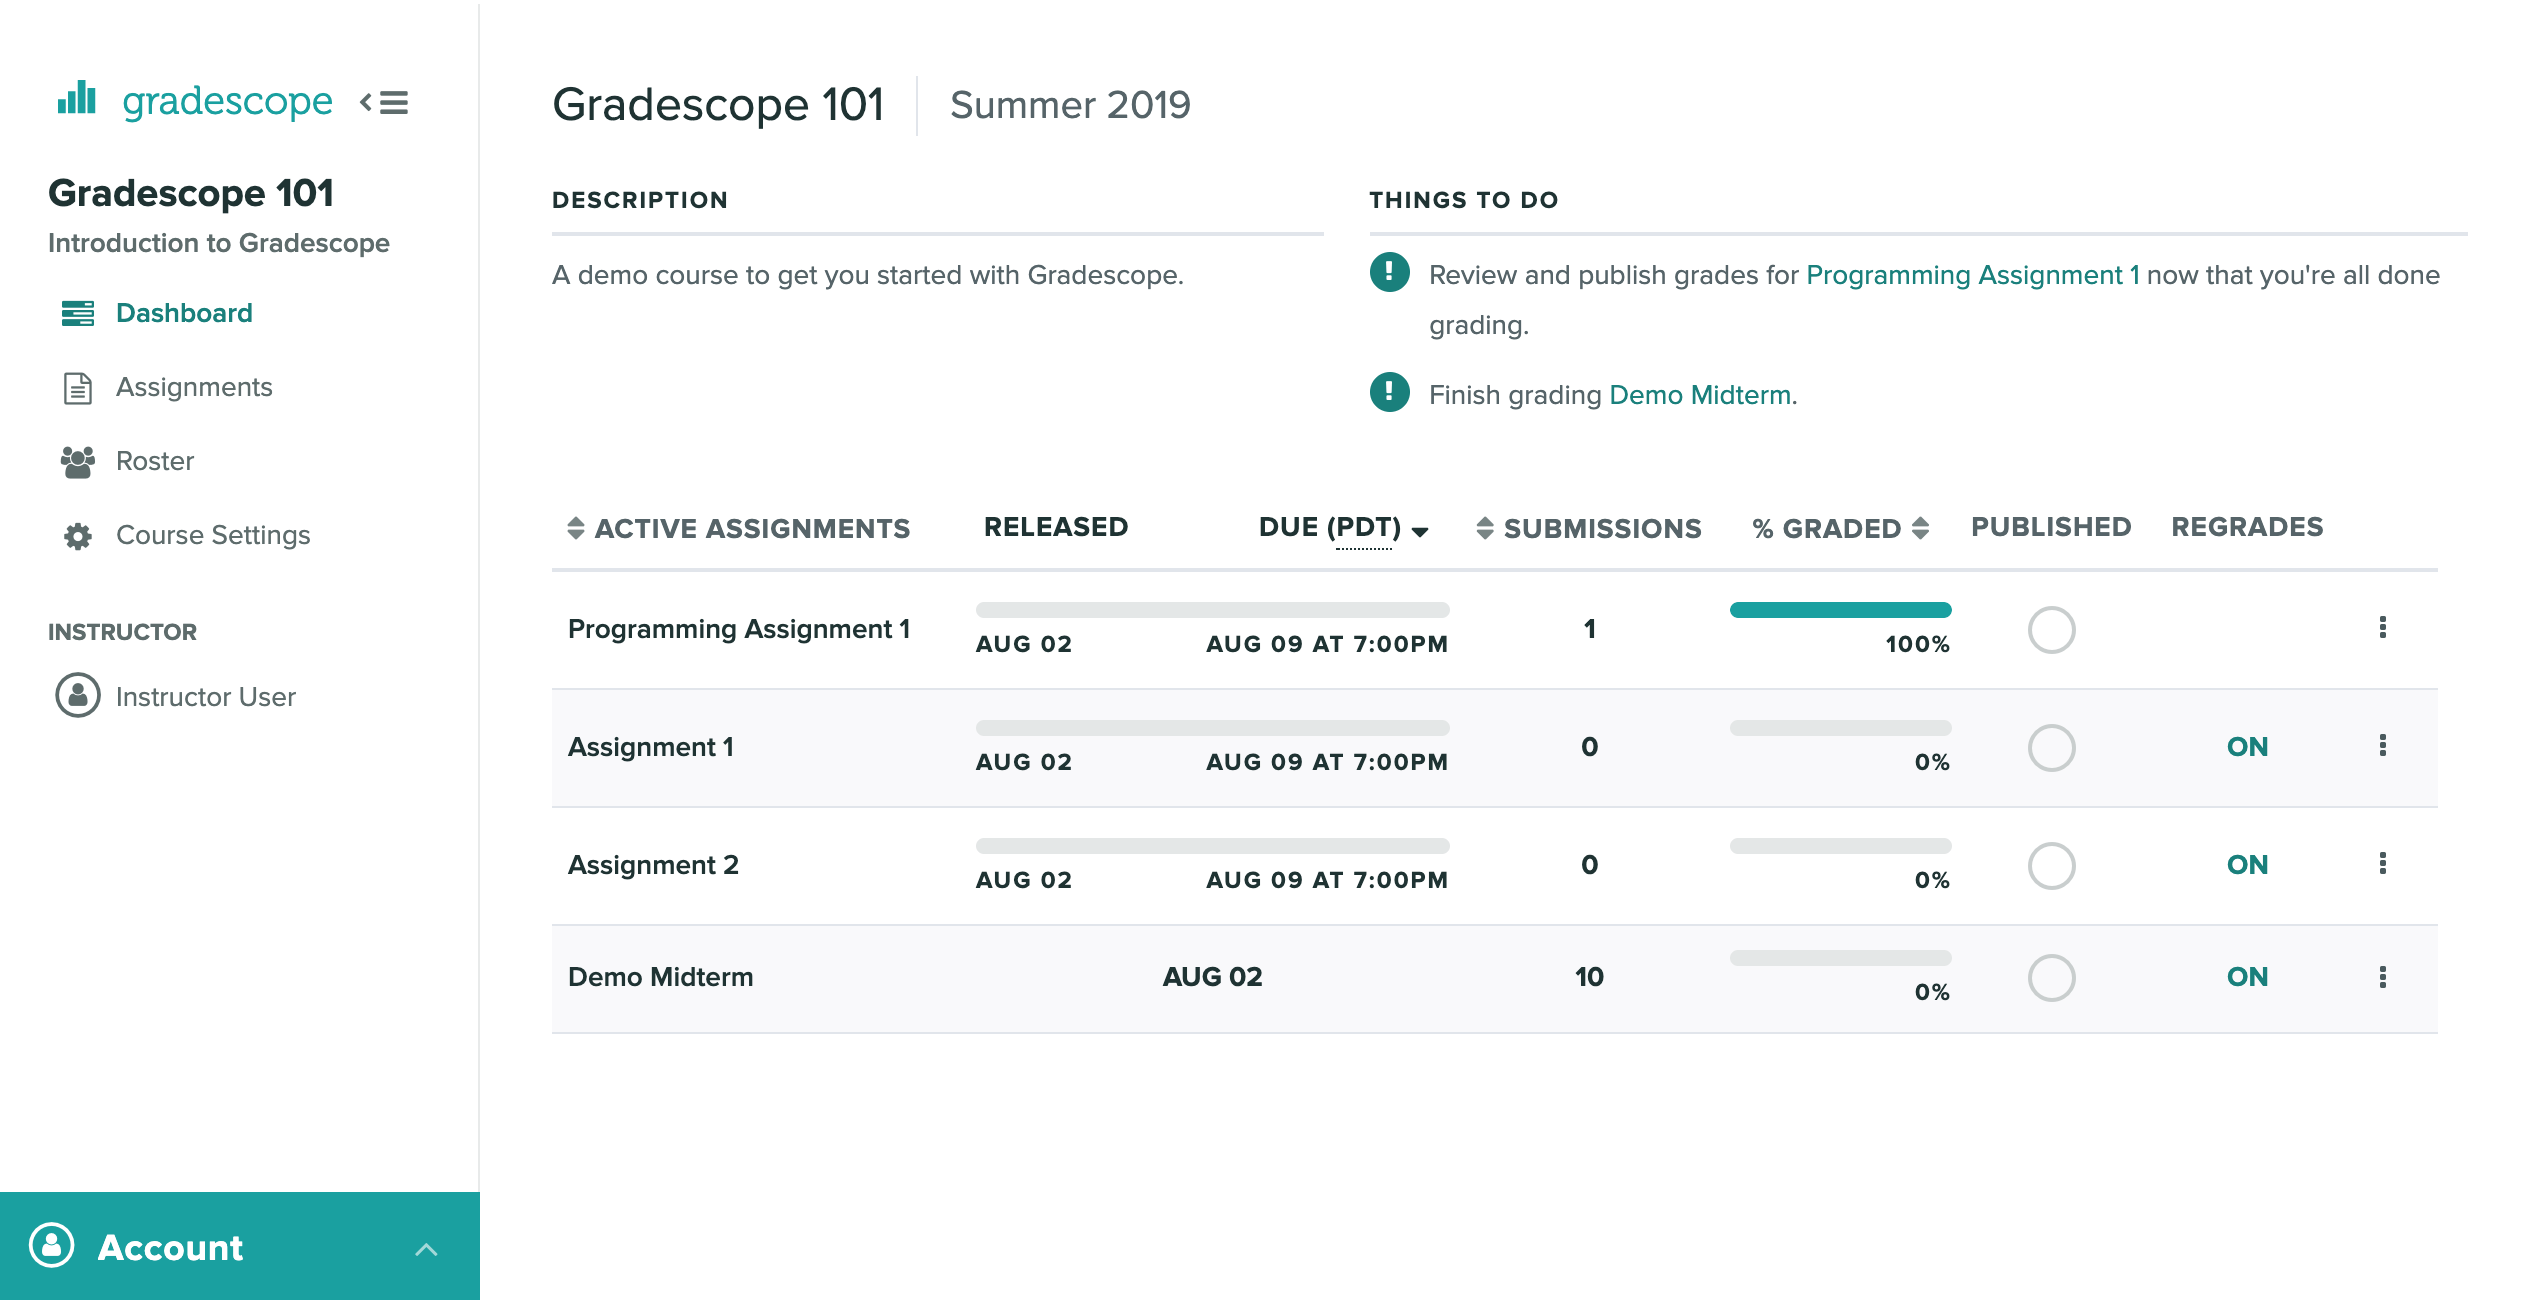
You can view all of your currently active assignments from the Course Dashboard. Assignments remain active unless they have been published, have no pending regrade requests, and have not been updated in a week. You can access all of your assignments (both active and inactive) from the Assignments tab in the left sidebar.
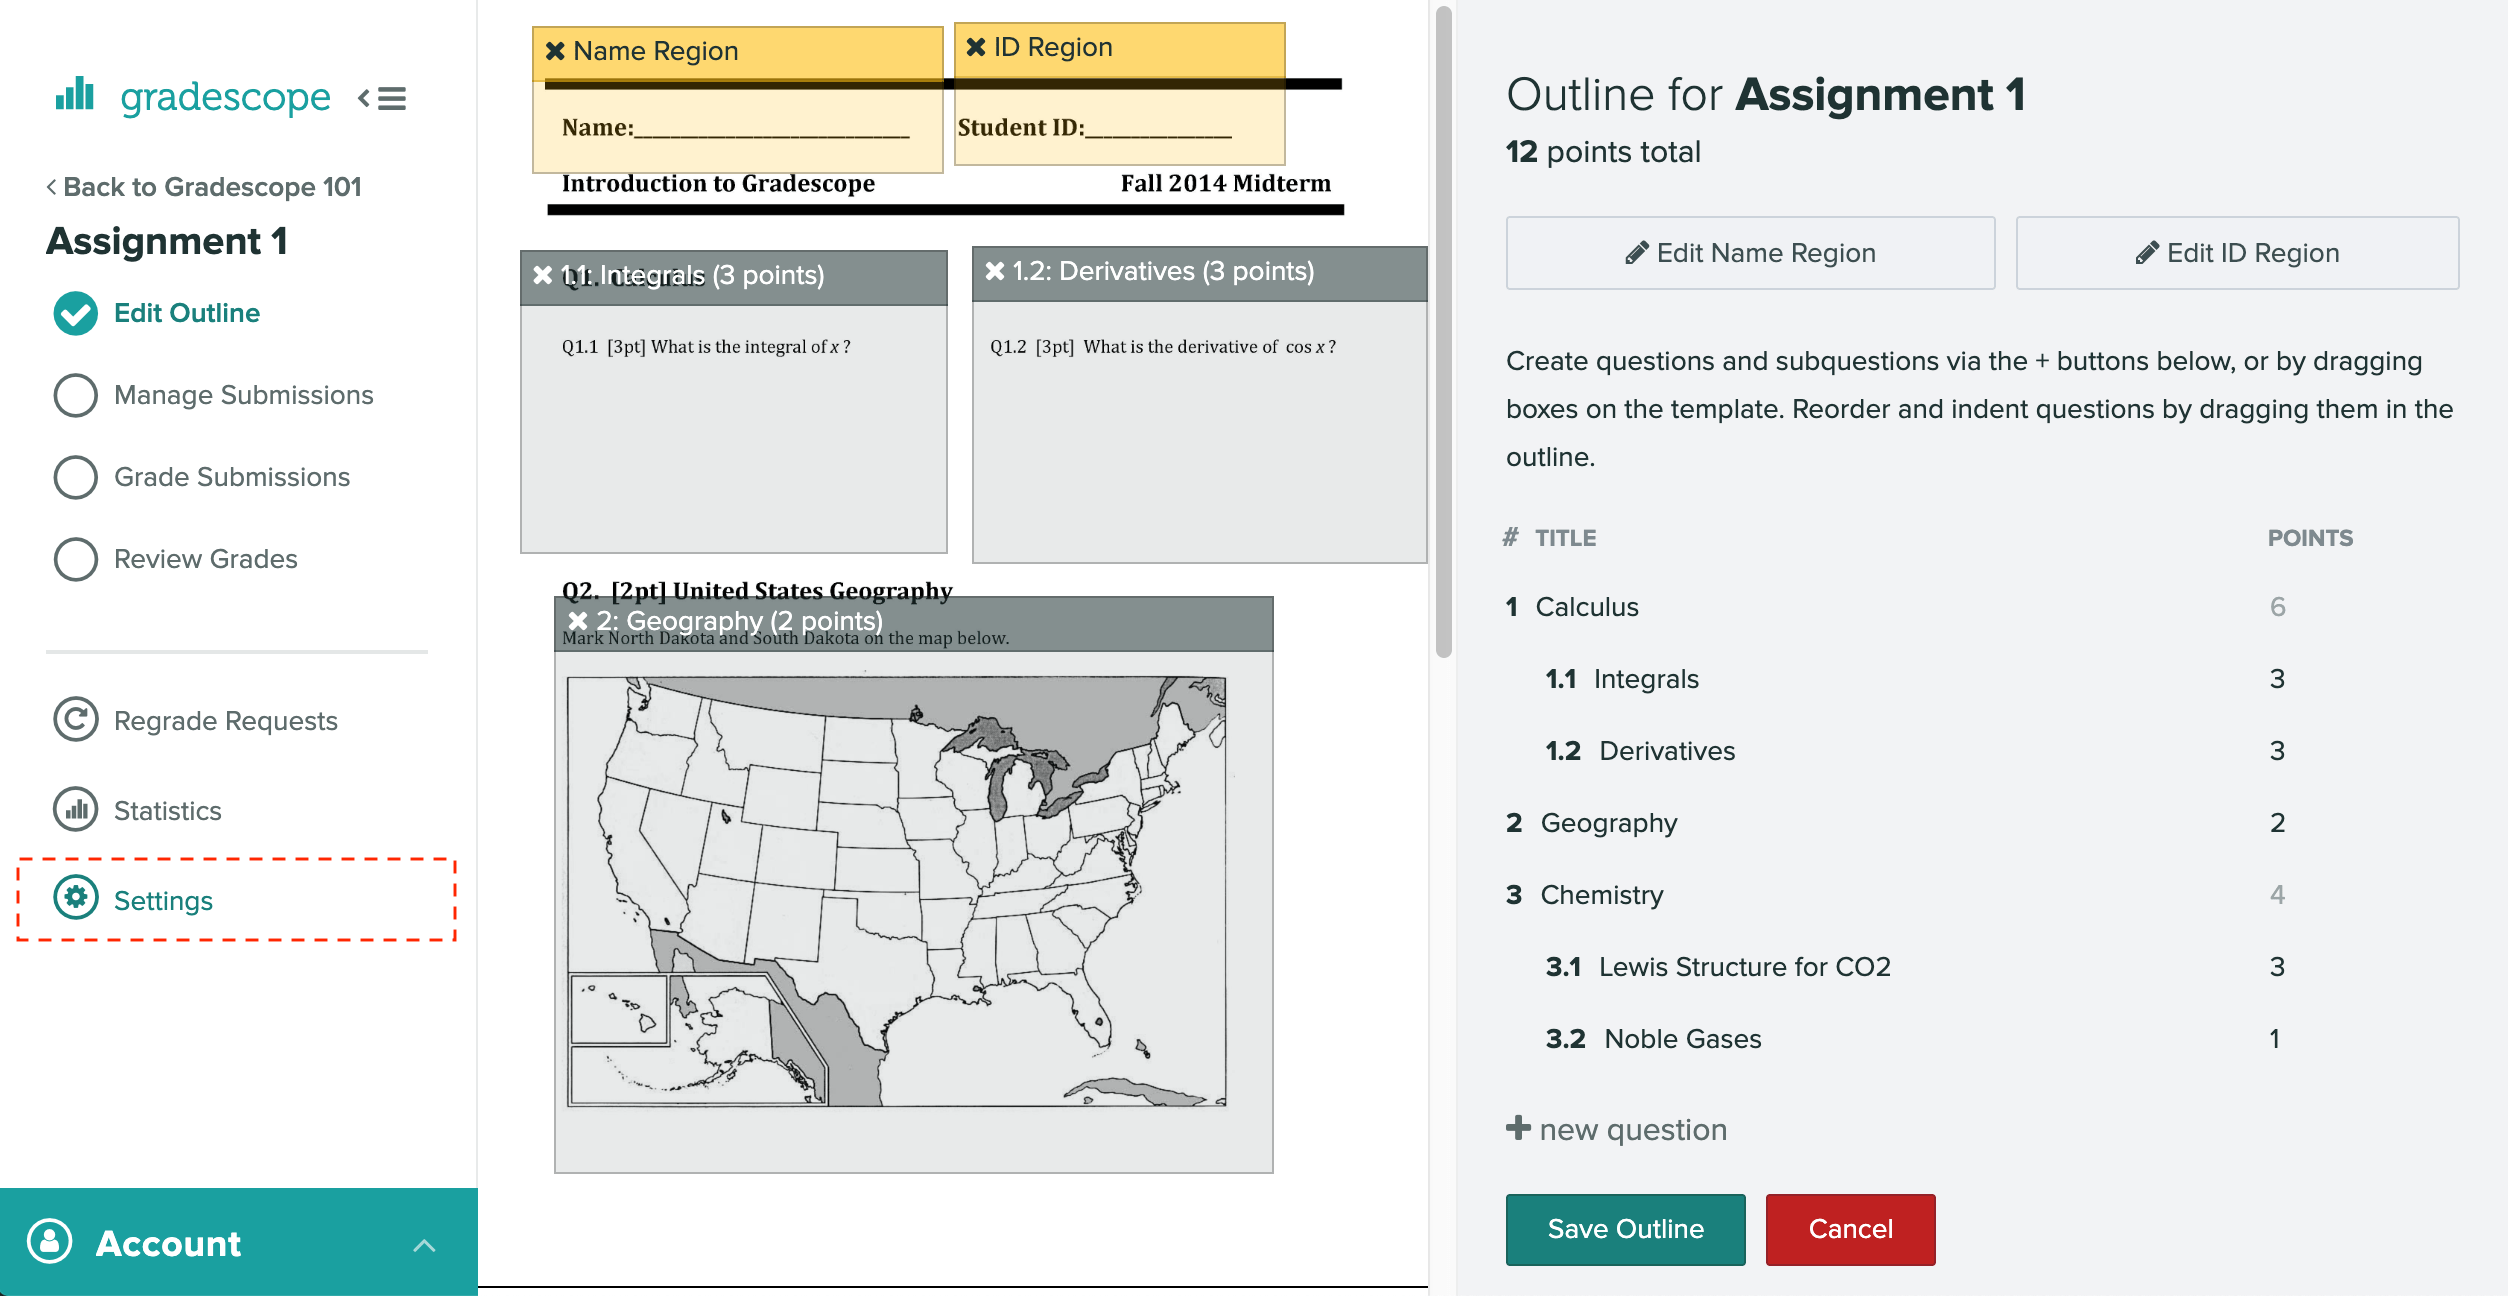
Editing an assignment's settings
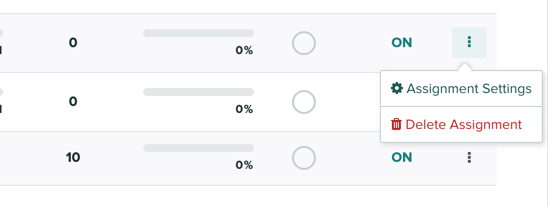
If you ever wish to change your assignment settings you can click on the three-dotted menu and jump to the settings page for that assignment. You can also navigate to this page from within an assignment and clicking on Settings in the left sidebar.
On the Assignment Settings page, you also have the option to set assignment-wide grading defaults, which include the default rubric type (positive or negative scoring) and default score bounds (maximum and minimum possible score). If you’d like these default settings to apply to all existing questions, check the Apply these settings to all questions check box.
If the assignment is linked via an LTI 1.3 integration, the Gradescope assignment name syncs from the LMS and can only be edited in the LMS.
Deleting an assignment
To delete an assignment:
- Go to the Edit Assignment page. You can choose from two ways:
- Open an assignment and from the left side menu, select Settings.
- From the Assignment dashboard, select the dotted menu and then select Assignment Settings.
- On the Edit Assignment page, go to the bottom of the page and select Delete assignment.
- Confirm your deletion, or Cancel if you change your mind. Depending on your assignment setup, you'll see one of two different confirmation messages.
Creating multiple versions of an assignment
The Organize Exam Versions feature lets you group together multiple instructor-uploaded Exam or Homework assignments into an Exam Version Set. Please note that assignment versioning is not available on Online Assignments, Programming Assignments, or any other type of student-uploaded assignment. To see how to use this feature on your instructor-uploaded Exam or Homework assignments, check out the article on Creating and Grading Multi-Version Assignments.
Bubble Sheet assignments allow up to five versions of the assignment during the creation of instructor-uploaded assignments. To learn how to add more than one version, check out our guide on Creating multiple versions.
Linking an assignment or gradebook column from an LMS to Gradescope
Check out our LMS Workflow section for instructions on how to link an assignment or grade item in Blackboard, Brightspace (D2L), Canvas, Moodle, and Sakai to Gradescope. The LMS Workflow section of the Help Center also contains step-by-step instructions, images, and gifs about how to use Gradescope with an LMS as an instructor and a student.
Alternatively, check out the LMS Integration video on our Get Started page to see how to connect your LMS to Gradescope and create and link assignments from the Gradescope website. Please note that the video only shows one method for using Gradescope with an LMS, but updated videos for each LMS are in the works.