Table of Contents
Sections
Updated
Manage your courses roster, assignments, or grade with sections in Gradescope.
Sections in the roster
Adding sections to the roster
If you want to manage your assignment settings based on sections, students must be assigned to a section in your Gradescope roster. There are two methods for adding sections to your course roster: sync existing sections from an LMS, or add them manually.
If you are integrated with an LMS, you may be able to sync your existing sections to the Gradescope roster.
- Access your course in Gradescope.
- Select Roster from the left navigation menu.
- Select the Sync **** Roster button at the bottom of the page. The button will be customized to reflect whatever you call your LMS internally; we have used Moodle for the example below.
- Depending on your LMS, you may be asked to check a box to sync sections. If there is no separate sections option, they will either sync automatically or the feature is not set up for your integration.
- Select Sync Roster.
- Students should now be assigned to a section within the Gradescope roster. If not, you can assign sections manually.
To assign sections manually or to edit existing sections:
- Access your course in Gradescope.
- Select Roster from the left navigation menu.
- Select the Download Roster button from the bottom of the page. It may be located within the More option.
- Edit the CSV file by adding a column named Section and fill in each student’s row with their applicable section.
- Upload your CSV file by selecting the Add Students or Staff + button and then select CSV file.
- You will be provided with a preview of how Gradescope has read your CSV file. Review the content and confirm when you are ready.
- Your roster should now include a completed Sections column.
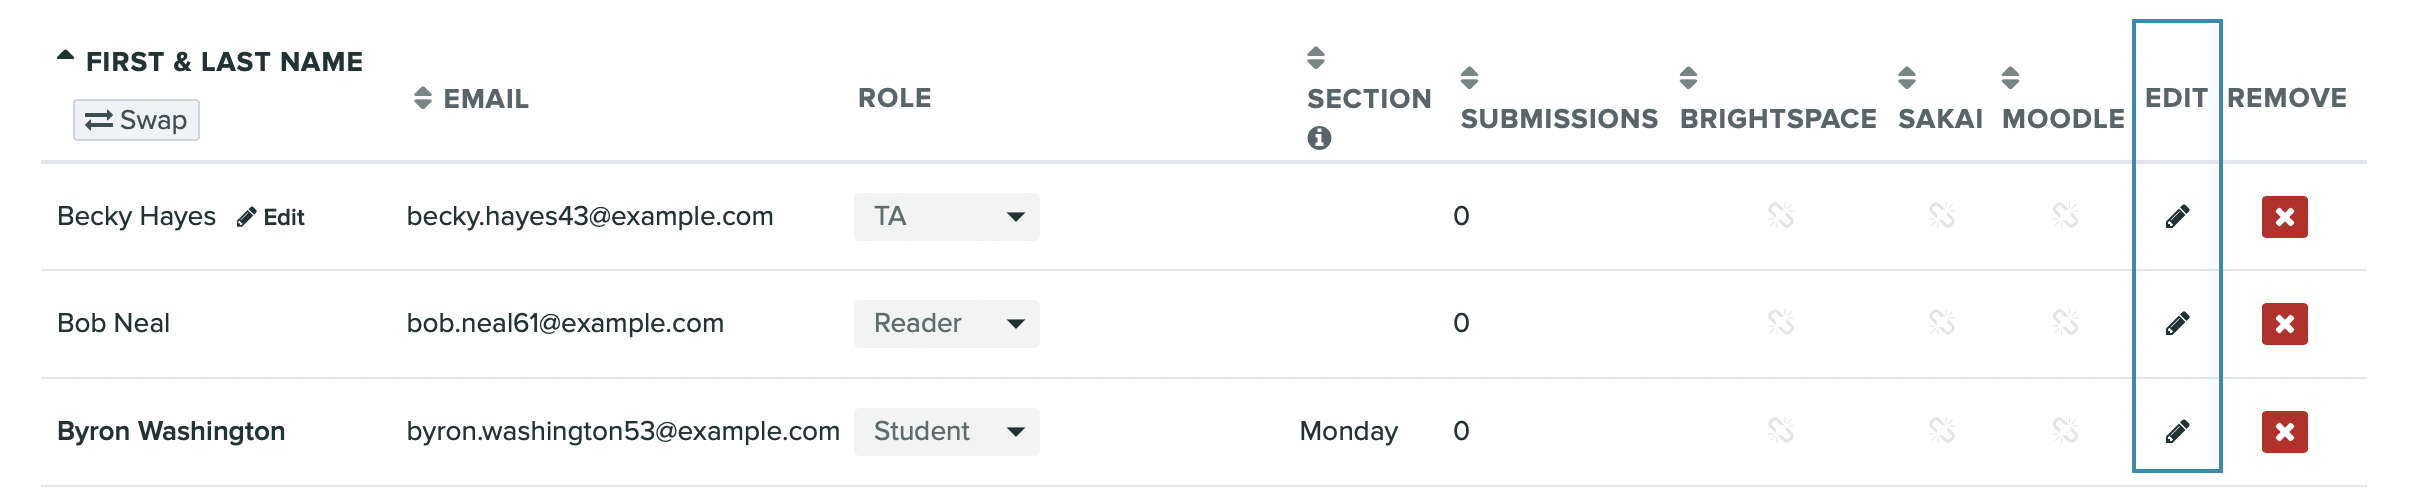
Editing student sections
To view or edit which section a student is assigned to:
- Access the roster for the applicable course.
- Locate the Edit column and select the pencil icon.
- You can either:
- Select a different section for the student from the drop-down.
- Create a new section by typing its name directly into the Sections box. This newly created section will now appear as an option for the other students in the roster.
- Remove the student from a section by selecting the X in the corner of the section name.
- Select Save.
Assigning multiple sections to a student

When a student is in multiple sections on a roster (for example, in a Lab and Lecture section) and this information isn’t automatically synced from the LMS, you can manually add the sections to each student. You can do this at any time, even in the middle of a course or after students have been submitting to assignments.
- Access your course.
- Go to the Roster page, and select Download Roster from the bottom action bar.
- Open and edit the downloaded roster file:
- Add another Section column.
- Title the column Section 2, then add the section (name or number) for each student.
- Save and Export it as a CSV file.
- To upload your edited CSV file on the Roster page, select Add Students or Staff+ and then select CSV File.
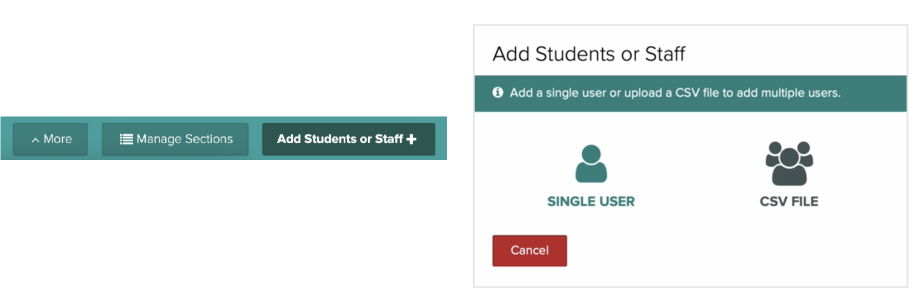
- To locate the CSV file on your device, select Select CSV. Select Next.
- Make sure there is a Section 2 column for the newly added section and that Student is selected for Role.
- Select Import.
- On the Course Roster page, you should see a student’s additional section display as an +x more link.
- You can customize the assignment's release or due date for a section on the Section Management tab in the assignment settings.
For example, let's say Katie is in Lecture A (titled section 1), Lab B (titled section 2). Her Homework 1 assignment for Lecture A has a release date of Nov 1 with a due date of Nov 3rd, but Lab B has a custom time window of release Nov 1st with a due date of Nov 2nd. Because Katie is in Lab B as well as Lecture A (2 sections in Gradescope), her Homework 1 will be due in the largest time window of Nov 1- Nov 3, because it is the most permissive time frame of the two sections.
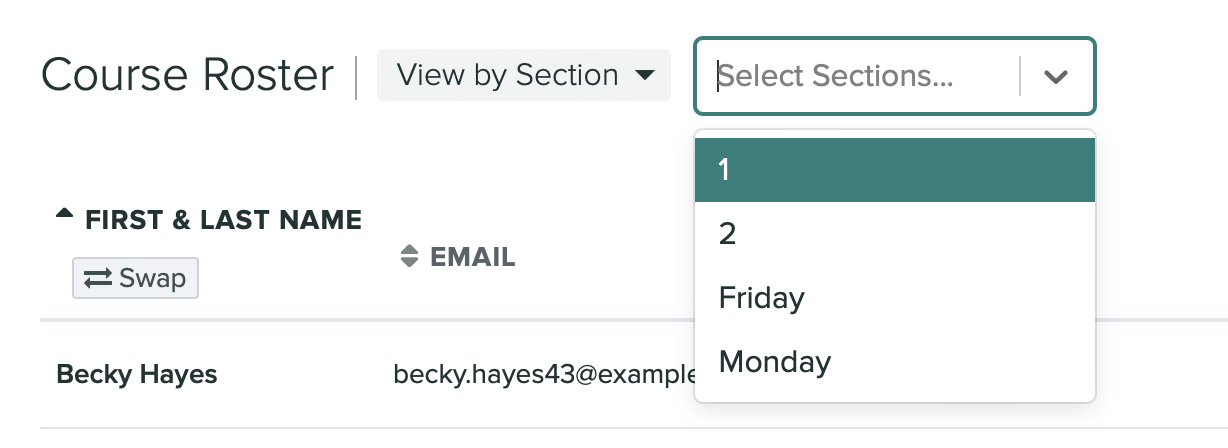
Viewing the roster by section
You can filter and order your student list by section on the Course Roster page. This gives you the option to view student information, such as names, emails, and submissions, by section.
To order the course roster by section:
- Access your course in Gradescope.
- Select Roster from the left navigation menu.
- View your roster by sections in two ways:
- To filter by a selected section, select Sections from the View by menu, and, from the second menu to the right, select one or more relevant sections.
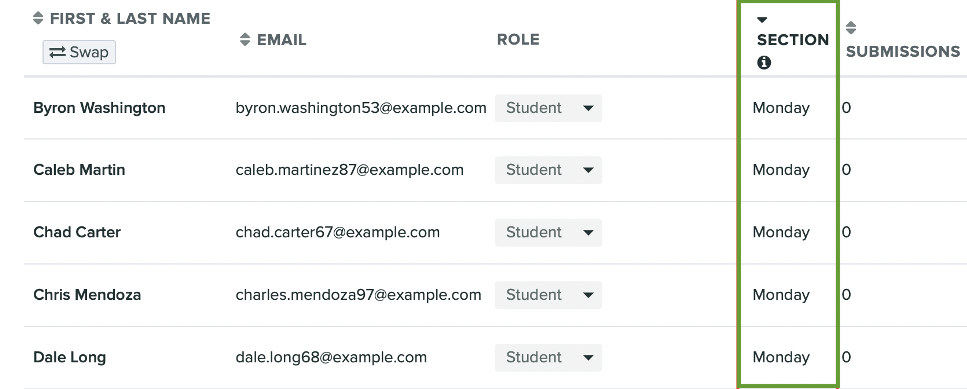
- To do a quick sort of all sections, select the Section column arrows. You should now see your student list ordered by section name.
Managing Sections
You can manage your course sections on the Course Roster page. When managing sections, you have the option to view your roster by sections, view the student data for each section, or delete a section with the Manage Sections button in the bottom action bar.

Viewing section data
You can view data for each section in your roster, such as the number of students, a full student list, and the number of submissions (for each student).
- Access your course in Gradescope.
- Select Roster from the left navigation menu.
- Select Manage Sections at the bottom of the page. You will see the Sections page with a list of all the sections, the number of students in a section, and an option to view a student list for each section.
- To view the student list for a section, select View Student List in the relevant section row. A Students in **** modal opens that lists students by their name, email, and number of submissions.
Deleting a section
Once you've added students to a section, the section can't be deleted. However, if you have a section that doesn’t contain any students, you can delete it from your course.
- Access your course in Gradescope.
- Select Roster from the left navigation menu.
- Select Manage Sections at the bottom of the page. This opens the Sections page.
- To delete a section, locate the relevant section row, and select the X.
- In the delete confirmation modal, select Delete.
Creating an assignment with sections
Once your students have been assigned to a section within your Gradescope course’s roster, you can utilize the sections feature when creating a new assignment.
- Access a course that has students assigned to sections in the roster.
- Select Assignments from the left navigation menu.
- Select the Create Assignment button from the bottom of the page.
- Choose your assignment type and then select the Next button at the bottom of the page.
- Fill in the setting appropriate for your assignment and:
- Ensure that it is a student-uploaded assignment (if you require specific dates for sections.)
- You will be able to edit individual section’s assignment dates on the next page, so we recommend setting the most commonly required dates on this page first.
- Select Next at the bottom of the page.
You can now edit individual sections to have their own customized dates or remove access to the assignment for specific sections by turning off the student visibility. If you don’t want to make any changes, or want to make changes later via the Assignment Settings page, select Create Assignment.
- Do you have sections which should not receive the assignment at all? Select the student visibility toggle for the applicable sections and turn it off. This can be reversed in the assignment settings at any time if required.
- Section dates can be customized individually, or in bulk.
- To customize multiple sections at once - select all of the applicable section’s checkboxes and then select the Customize Dates & Student Visibility button.
- To customize an individual section - locate the section from the list and select Edit.
- Edit any of the assignment date settings that are applicable to your selected sections.
- Select Apply.
- Once you have made any required edits to your sections’ assignment settings, select Create Assignment.
- Your assignment will now be listed on the Assignments page. Select the down-facing arrow beside the assignment name to reveal the individual sections and their dates.
Editing section assignment settings
To edit section-specific assignment settings:
- Access a course that has students assigned to sections in the roster.
- Select Assignments from the left navigation menu.
- Select the three vertical dots at the end of the row of assignment details.
- Select Assignment Settings.
- Select the Section Management tab.
- Make any required edits.
- It is possible to turn student visibility back on.
- If sections have already been modified with specific dates, they can be edited again if required.
Grading
The grade by course section option gives instructors and TAs another way to view, filter, and grade submissions for a given question. When using this option, you are grading submissions of a specified section rather than grading all submissions in the entire assignment.
Some assignment types can't be graded by section:
- Bubble sheet assignments cannot be graded by section, because this assignment type uses automated grading.
- Templated Assignments (Exam/Quiz and Homework/Problem Set types) can’t be graded using AI-assisted grading/manual answer grouping and grading by course section at the same time. To grade a question for this assignment type, you’ll have to choose between two grading scenarios: use answer grouping and grade all submissions or use grade by course section and grade the submissions in each section individually.
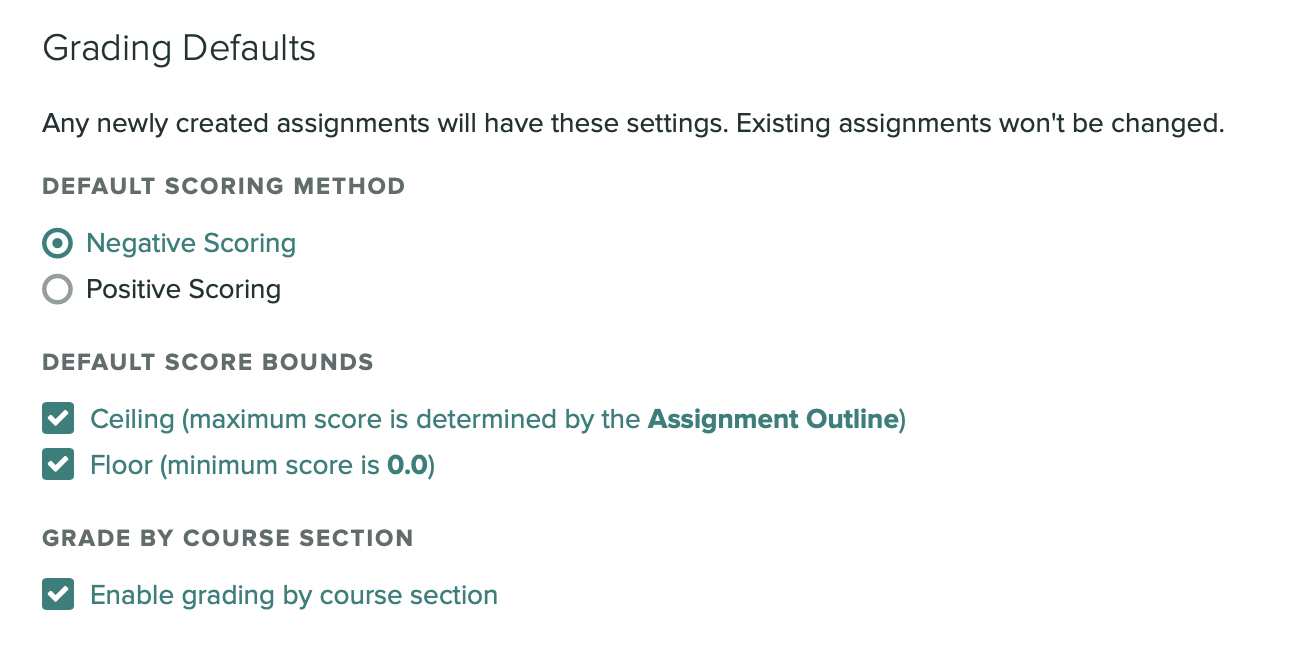
By default, grading by course section is enabled for all assignments in the Course Settings. You can disable it at any time by deselecting Enable grading by course section checkbox. If disabled in Course Settings, this will only apply to new assignments and any existing assignments in the course will still have it enabled.
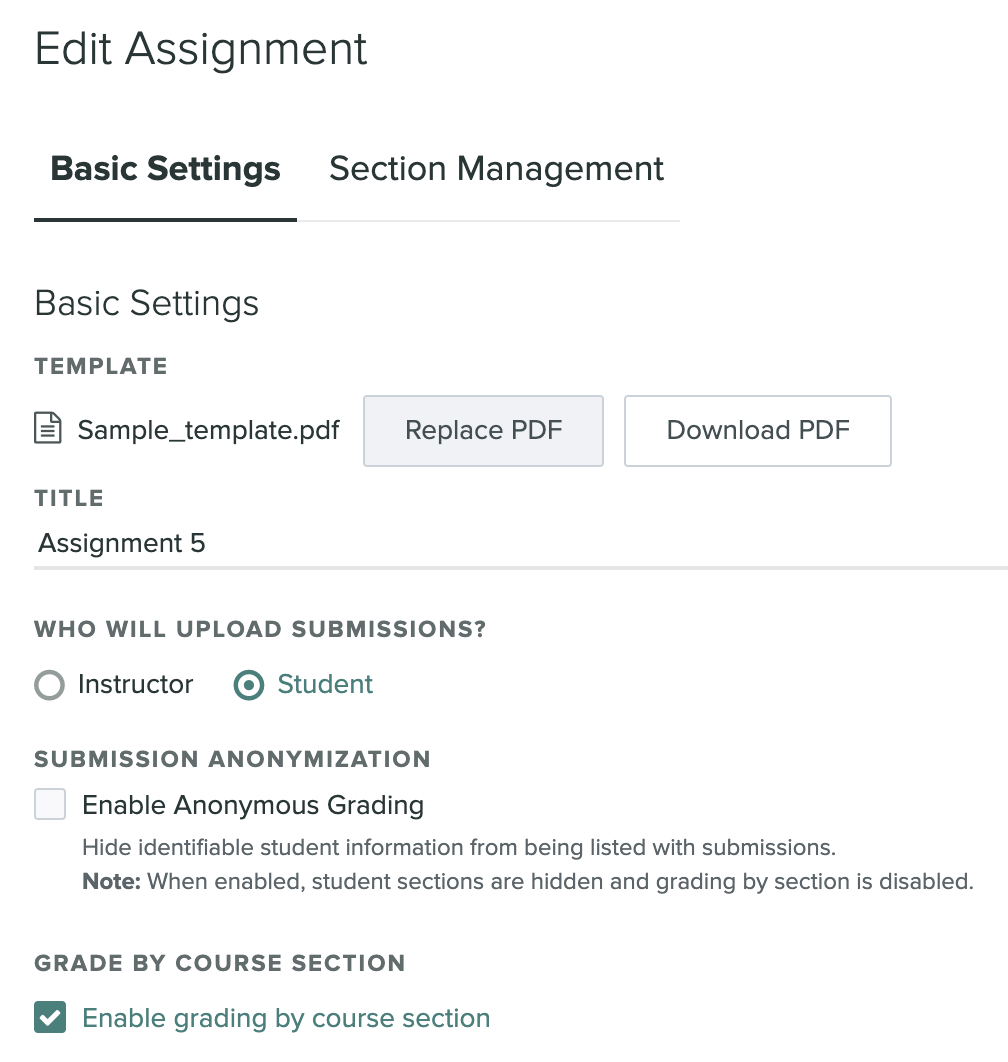
If you want to enable it or disable it for an individual assignment, do so in the assignment’s settings. Make sure to Save your changes.
Grading by section
- Access your course.
- Open the relevant assignment.
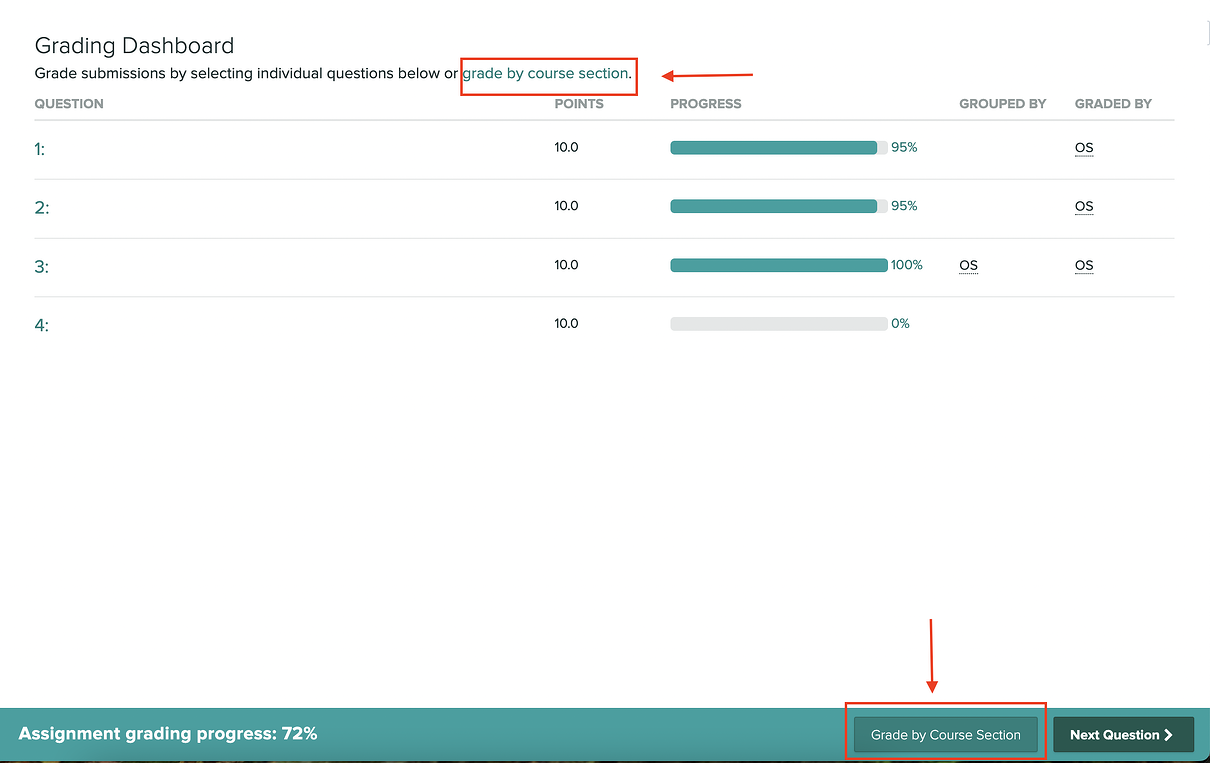
- To view the grading dashboard, go to Grade Submissions.
- To grade a question's submissions for a specific section, select either the Grade by Course Section link or button.
- Select a question and one or more sections to grade in the Grade by Course Section modal.
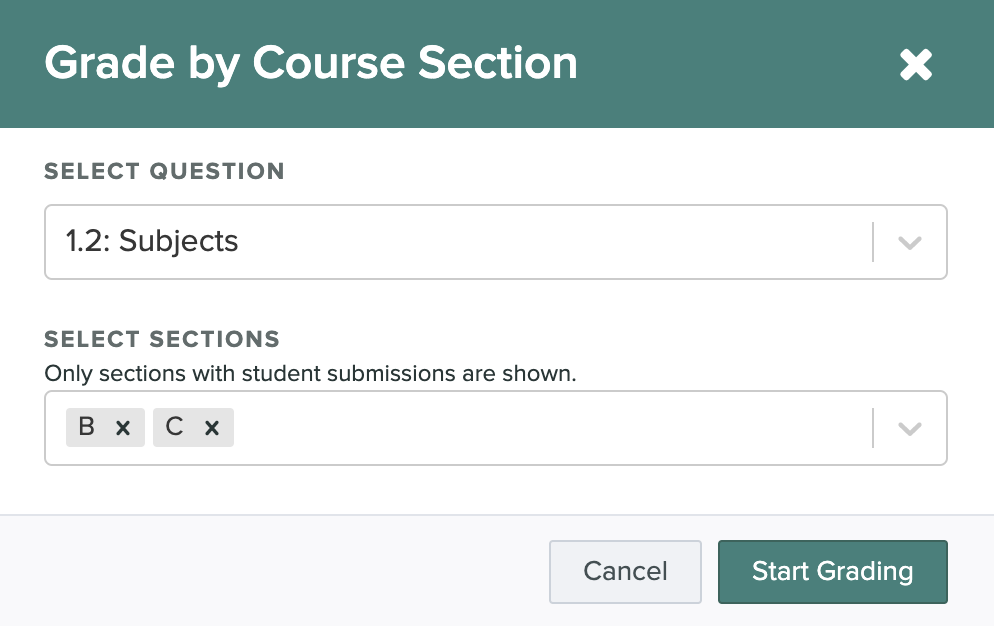
- Select Start Grading.
Managing submissions while grading by section
Once you’re in the grading workflow, you can choose your preferred grading order (if you're grading multiple sections) as well as view where you are in your grading progress.
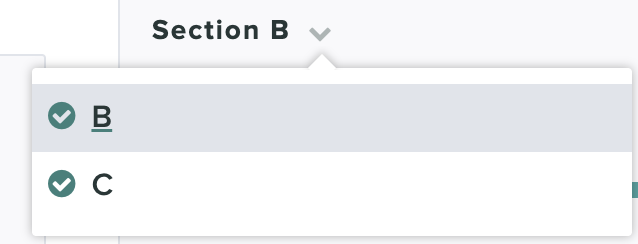
If you want to switch between sections for viewing or grading, use the Section drop-down in the top-right corner of the page. When you are grading multiple sections they will be ordered alphabetically, so this can be helpful to set your own grading order.
When all of a section’s submissions for a question have been fully graded, the section will have a check mark next to it.
View your grading progress within the current section with the submission counter at the bottom of the page.

Statistics
The statistics page allows instructors to gain insights into student performance for the assignment. The statistics page can be filtered to view the data for selected sections of students. Learn more about general assignment statistics.
To filter statistics by section:
- Select the assignment.
- Select Statistics from the left navigation menu.
- Beneath the heading Filter Statistics by Section, type the name of individual or multiple sections to view their statistics.
Section FAQs
What happens if a student is assigned to multiple sections within the same course?
If a student is assigned to multiple sections, they will only be shown the assignment once. If their sections are customized with different dates, they will be shown the assignment version that has the earliest release date or latest due date.
What happens if a student is assigned to multiple sections within the same course and I hide an assignment from one of their sections?
When a student belongs to two or more sections and one of their sections has the assignment visibility turned off, the student can still view and submit to the assignment. Because the student is enrolled in one section that has assignment visibility enabled, students will be able to access it (as the assignment isn't hidden from that section).
How do group submissions work when using sections?
Students can only submit when their section assignment date allows, but they can add group members from any section after submitting.
Will students see which section they are assigned to in Gradescope?
Students will not be shown which section they are assigned to. They will only see their assignment with the dates that were set for their section.
What happens to my sections if I duplicate an assignment?
Duplicating an assignment will not carry over any edits to sections. It will continue to duplicate all of the main assignment settings.
How do section settings work together with assignment extensions?
Sections still allow students to receive extensions on their assignments. On the Extensions page, you will see all of the section’s settings listed, such as the release date, due date, time limit, and visibility, to make it easier to give a student an appropriate extension based on their section.